First Solo Bike Tour – Cycling from Preston to Mum’s in Northern Ireland over 7 days

I was lucky enough to attend the Cycle Touring Festival last weekend and heard some great inspirational talks by experienced cycle travellers. Even more inspirational was getting the chance to chat to so many other cycle travellers. Some people had done many thousands of miles while many, like myself am sort of just getting into cycle touring.

One thing I did take away was how helpful it is for people to share their experiences. So I have put this article together on my first solo 600 km cycle tour in September 2023 ( finished the week before the festival )

I am mostly only a beginner so these are not expert views at all, but hopefully other beginners can relate. The route is a fantastic route that is very straight forward and takes in 3 countries. You could easily modify it to take in Southern Ireland and Wales as 4th and 5th regions by getting a ferry from Dublin to Holyhead for the return leg.

This was my first solo bike touring trip. As a family we have done various kid friendly multi-day camping trips like our Danube trip and the Way of the Roses is the UK. I have always really loved the family trips but the kids are older now and I wanted to try cycle touring as a hobby. It would be great to do these trips with company but I wanted to see how I found it and what my “preferred pace” was. The pace is not a target, the journey is more important, but having a similar expectation of pace to travelling companions is probably useful. The answer is 75 – 100 km per day at @16km /h and generally camping :-).

I did the trip in 7 cycle days although I did work in Ireland for 2 weeks before cycling home via Liverpool over a weekend.

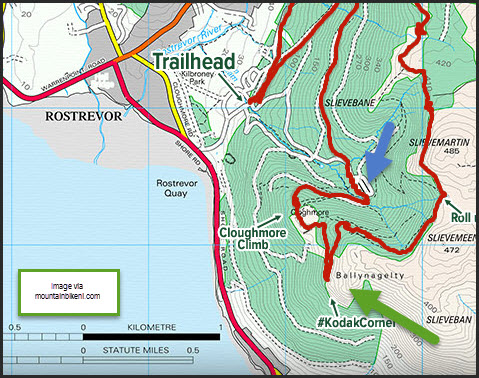
You can download the whole gpx file here and there are map links for each day below. Note that these are the actual journey and include occasionally getting lost and other minor diversions, I wouldn’t follow them exactly 🙂 => https://seancull.co.uk/wp-content/uploads/2023/10/Ireland_Sep_2023_combined_track.gpx

Cycling Day 1 – Preston – Kendal

https://cycle.travel/map/journey/500491

Day 1 was a fantastic first day. I was nervous about the first day as it was the only day where I had to reach a fixed destination and I wasn’t sure what I could achieve. It was fine.

The day went really well and was almost exclusively on either tow paths or quiet roads. The tow paths were pretty but the surfaces were sometimes a bit rough. I was fine with my 700c 33mm touring tyres but I wouldn’t want to have been on road tyres. There were three sets of steps, each had a channel to roll the bike but it was a little awkward with panniers.

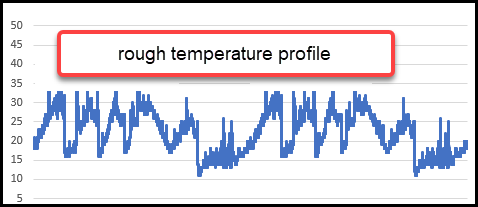
The weather for the whole trip was exceptional, almost too warm. I drank 6 litres of fluids on this day. I had 3.5 litres on the bike when full but getting new water was straight forward. I used these Electrolytes in my water but there are many similar brands.

I met another British cyclist along the way who had cycled from the Baltic via Lands End. I stayed with a friend near Kendal in the evening but there were camping options too.

Cycling Day 2 – Kendal to Near Carlisle

Bike map | Cycle route planner | cycle.travel

Day 2 was another gorgeous day. Again I was a bit nervous as this was my first hilly day with 93km and 1100 meters of ascent. I had three different campsite options and some potential wild camping spots if I needed them so I just took it as it came. I had chosen the Trek 520 because of the low gears ( 26/36 ) and they worked brilliantly.

The days most memorable thing was bimbling through the beautiful countryside, mostly freewheeling.

The new Garmin Edge 1030 was ace. The hill feature where it displays the hill profile and counts you down is very helpful. It was also great to be able to see the map on a bigger screen than the old 5 series one.

Camped at “Camping Cardewelles” just south of Carlisle

Other campsites I looked at were

Holy Bank Farm, Penrith

Cherry Trees Farm, Wigton

Caldbeck Camping, Wigton

Cycling Day 3 – Carlisle to Dumfries

Bike map | Cycle route planner | cycle.travel ( note has a detour to see swans )

Day 3 of cycling to Mum’s. 87km and supposedly 400m of climbing ( felt flat ). Very hot although cloudy. Felt long

Sculpture by the same artist as the Warrenpoint Irish Elk

Solway coast was nice. Chatted to some lovely locals along the way. Most interesting was an ex BSB motorcycle racing mechanic who retired, quit motorcycling and took up cycling. Lovely character.

Interesting WW2 explosives factory museum ( Devils Porridge ) that made me think of Buckshaw. Will visit properly next time.

Overall Scotland is noticeably more chilled. Asked about wild camping by a cafe out of curiosity and the response was “but of course – it is Scotland after all”. Traffic very courteous, actually England was good too, maybe it’s the panniers and the drivers thinking “Poor Bloke”

No camping tonight though as a family friend who is on holiday has very generously lent me her house 🙂

I also looked at camping at Caerlaverlock Community Camping just south of Dumfries and there was very friendly wild camping next to the carpark in Glencaple ( would have been my preference )

Cycling Day 4 – Dumfries to Belfast

Bike map | Cycle route planner | cycle.travel

132 km and 1000m day. Wasn’t expecting that 🙂

Really nice day. The Galloway Hills are really beautiful and the cycle.travel app picked a gorgeously quite route. I saw 3 vehicles in one 3 hour section.

Started in Dumfries planning on Newton Stewart but then extended onwards looking to wild camp. There were loads of lovely wild camping spots up on the fells but everything just kept coming and I realised I could make the ferry a day early.

Probably got a bit carried away with the last 30km but enjoyed it. I am sure the uncooked baked beans, tuna, milk and pasta bought for tonight’s meal helped me go faster down the hills.

The route turned into a stone track towards the end. The bike was fine but a proper road bike would have struggled a lot.

Got the ferry via the reserve list. Into Belfast at 22.30 with another 10km to go but my front light failed within 50m. It was fully charged 😞 the trip through Belfast was a bit stressful and I had to use pavements and stop quite a bit to avoid confusing traffic. Got a bit lost as a result too.

Got to my sisters and chilled. Rest day tomorrow.

Really chuffed with today. Think I definitely prefer moderate hills to flat.

For camping I had looked at

Caravan Site | Dumfries and Galloway | Machermore Far (machermorefarm.co.uk)

Balloch O’ Dee Campsite (ballochodee.com)

Welcome – Aird Donald Caravan Park, Stranraer Family run for over 60 years. (aird-donald.co.uk)

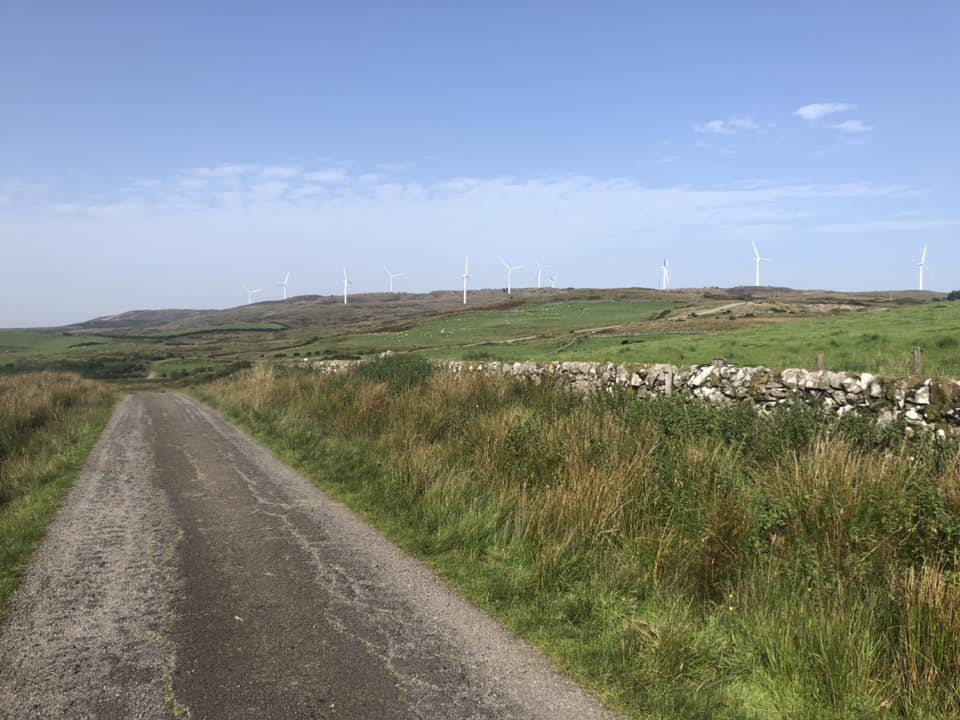
There was loads of wild camping opportunities, I would have gone for the Windfarm to the east of New Luce

Cycling Day 5 – Belfast to Warrenpoint ( Mums )

Bike map | Cycle route planner | cycle.travel

Day 6 of cycle trip to mum’s – arrived.

Day 5 was lovely rest day at my sisters and day 6 was 78km from Belfast to mums. 1000m of tough climbs, I didn’t expect that.

I took the tow path from Belfast to Lisburn direction. It was by far the best tow path of the trip, brilliantly surfaced the whole way.

Belfast to Lisburn greenway

After Lisburn it was across country through the drumlin hills

It was the toughest climbing of the trip. The drumlins are quite steep and the minor roads seem to just go right up them. I am guessing but I think the road structure is influenced more by the boundaries of the small farms than the best route for traffic.

The route planner estimated 600m of climbing but it was 980. It also felt like the gradient data was a bit vague as the Garmin frequently thought climbs were shallower than they felt.

The image below is not great quality but this Irish Elk sculpture is at the entrance to my Irish home town and I know the artist from the kids climbing club in Preston where I live in England – small world.

Cycling Day 6 -Back to Belfast for the Ferry

Bike map | Cycle route planner | cycle.travel

I worked at mums for a couple of weeks and had a vague plan to cycle to Dublin and then take a ferry to Liverpool. The problem was that P&O do not take bicycles – don’t start me. I could have taken a bicycle on Stena to Holyhead but i needed to get back in a weekend.

So I cycled back to Belfast and took the overnight ferry to Liverpool. The weather had changed quite a bit over the two weeks when I was working in Ireland and I was glad I had still taken my autumn gear despite the unseasonably warm weather on the way out.

I took a similar route to the way down but went via Hillsborough to get a coffee to eat with the substantial sandwiches my mum had made 🙂

I got caught in heavy rain for the last 10km to the ferry after dark ( I had stopped to see some friends on the way and the ferry was at 10pm ). I was pleased I had good lights.

I did get bit concerned as I followed the suggested cycle route through the secure area of the Belfast docks. I had this image of the gate being locked ta the far end and missing my ferry having had to retrace 3 miles of route. The unmanned security gate was closed but there was an official bicycle sized hole in the security fence 🙂

Loading the bike onto the ferry was not the smoothest experience. I was left to load it onto a bicycle trailer that already had two touring bikes on it. The whole arrangement was a bit clumsy and not particularly safe in terms of the potential for customers to hurt themselves. No staff helped. It was then a bus ride to the ferry.

Somewhat dodgy bike trailer

Once on the ferry I discovered that I was already a Gold Member with access to a free lounge with lots of food. There were no cabins left but the staff were very helpful and I bedded down for the night in a quiet corner and slept in my camping gear. I didn’t sleep great so next time I might book earlier and splash out on a cabin.

Cycling Day 7 – Liverpool to Home

Bike map | Cycle route planner | cycle.travel

The ferry got into Liverpool at about 06:30. By the time I got cycling it was about 07:30.

I was on a bit of a mission as my son was leaving for university that afternoon so I pushed quite hard to get home quickly. That evening my legs ached for the first time in the trip.

The ferry comes into Birkenhead which is actually south of the river Mersey from Liverpool so, as far as I understand, you need to take a train or a tunnel.

Cycling through the Queensway tunnel is only allowed at night and on Sundays, I was fortunate that this was a Sunday. It was quite an experience as the tunnel is 3.2km and goes 50m below the river bed. ( not my video but you get the idea ). The drivers were mostly excellent ( all were at least OK ) but it is quite a slog back up out of the tunnel and then up the hill that the route follows – much hillier than I was expecting.

Entrance to the tunnel

The rain held off and I was home by late morning.

Thoughts on Route Planning

The most important bit for my route planning was the cycle.travel web site. I was a bit sceptical at first because it added 10 – 20 % to my routes over Komoot but the routes that it suggested turned out to be simply wonderful. I also liked the way the routes were displayed on the screen in the multi-day format with regular distance markers.

There is a cycle.travel iOS app but the functionality is more limited than the web site. I found that on both my computer and my iPhone I could very quickly transfer the route from cycle.travel to Komoot where there were some better tools for checking the surfaces and adjusting the route before I then dropped it onto my Garmin.

I sometimes also used Google Maps to look for campsites and shops.

Cycle.Travel has been developed mostly by Richard Fairhurst from the UK. I work in IT development and I am quite honestly in awe at what he has achieved. This YouTube video from the 2022 virtual Cycle Touring Festival is well worth a watch to get a feel for how the system works.

Thoughts on Kit

I think I got the kit list about right. This is the list with some more thoughts.

The bike ( Trek 520 ) was brilliant, especially the low gears ( 26/36) . In hindsight the frame ( 54 ) may be a bit small for me but it was right by leg length. I also tend to get on by “stepping through” when I have panniers so a larger frame might have problems too. I bought this handlebar raiser just before I started and it made my riding position much better.

The Brooks B17 carved saddle was ace. I noticed it but it was never painful.

The handlebar bell was really useful on the greenways and tow paths.

I used my phone to take pictures ( should have cleaned the lens more ). I kept it in the day bag on airplane mode and it lasted well. I probably used it 2/3 times per day for navigation but most of the time I used the Garmin.

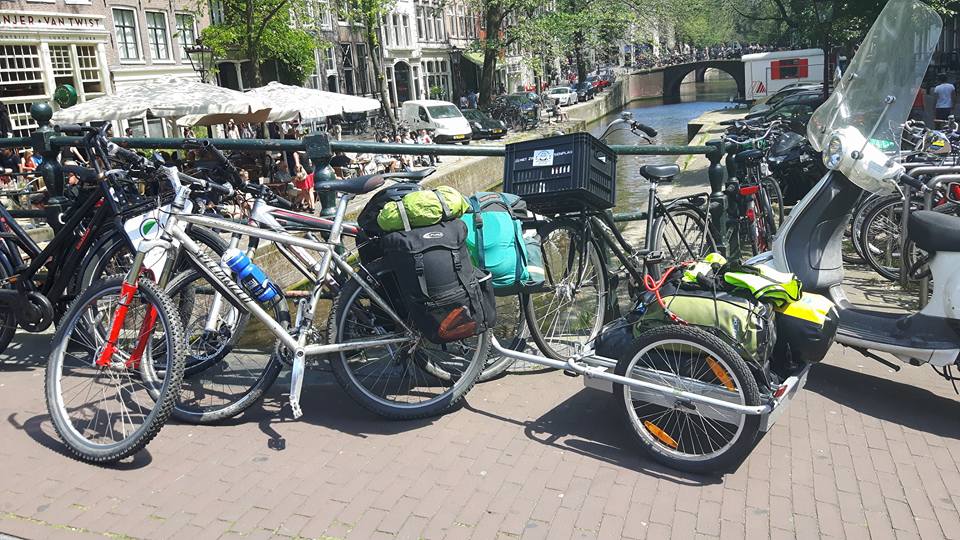
The Ortliweb panniers worked well but I was glad that I replaced the fiddly shoulder straps with shock cord before I left. The front panniers are smaller than the back ones but I purposefully packed the stove and heaver items up front. I had the tent on the rear rack and a day bag on the front rack for food, tools, sun cream etc.

The three water bottle holders were a god send in the hot weather. I had originally only expected to use the 3rd one on the last leg to a wild camp but I used it during most days.

The Jetboil stove worked pretty well. I had wondered if I had overdone it also taking a camping pot but I did find that the integral Jetboil pot was so thin that it was easy to burn the pasta/tuna/beans meal that was my staple. I was glad I had a more substantial pot. It also gave more flexibility. I had purchased the Jetboil pan support. Next time I would bring a small gas lighter as I managed to get the automatic Jetboil lighter wet and had to borrow one from a nearby caravan.

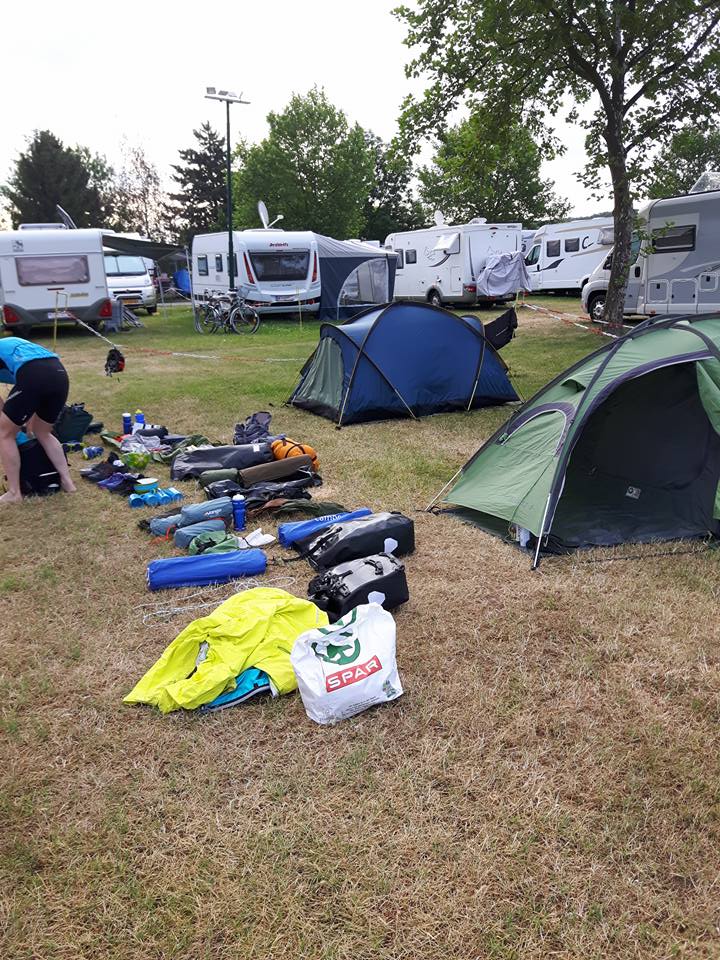
For sleeping I had a summer down sleeping bag with a pertex liner and a Gore-Tex bivvy bag. The system took up a fair bit of room but I wanted to try a layering approach to see how that worked. I would certainly consider doing the same again. I used the same system at the Cycle Touring Festival a few weeks later in October and it was only just warm enough.

Cycle stands are a contentious subject but I would not be without one. I was lucky enough to have a cycle frame that had an integral mounting plate.

Thoughts on costs

I was curious about costs because I would love to do longer trips in the future. Because I was on my own, and on holiday, I did eat in cafes several times a day. The key costs were :
Ferry – @£50 per trip
Camping ( where needed ) – @£15 per night
Cafe stop – @£10 – £15 per stop, 2 times per day
Food to eat / cook – £10 – £15

So @£50 per day + £100 ferry. It could be done cheaper but these were my costs for this trip.

Summary

The trip was a fantastic experience that I would heartily recommend. It took in three countries, multiple ferries and all in 7 days cycling. If you skipped the southern leg in Northern Ireland it could be 5 days cycling or if you went home via Dublin Holyhead it could may be 9 – 10 days cycling with the Republic of Ireland thrown in. Going into Ireland via Larne rather than Belfast could be interesting, I have not looked at the feasibility of this.

It was a great introduction to cycle touring and I now have a much better idea of what I could achieve if I was touring with others. The headspace was great but company would be good too.

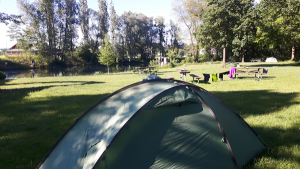
Taking a tent was a really positive thing. It meant that I was able to undertake each day knowing that I would always have somewhere to stop. The English portion might have required some wild camping ingenuity but the Scottish leg would have been much more straight forward.

Fixing Nespresso / Krupps XN 250A coffee maker – coffee leaking / going straight to overflow

Quick Post.

Our Nexpresso Krupps coffee machine was broken with the coffee coming out of the wrong part. There are lots of videos on how to take them apart but the fix for me was very simple and cheap.

This is the part required => XN250A Steam Cover | www.partmaster.co.uk

It came in 48 hours and cost less than £10 in total..

The problem was that the small tags had worn away and the spout did not move correctly. Note that you need a fancy Torx security tool to remove the three screws ( see Youtube )

Fast connection with Starlink

Using Starlink for Rural Broadband

Experience using Starlink for Internet

At Bigert Mire in the Duddon Valley, Cumbria we have struggled with “rural broadband” for some time. This has meant speeds of 1.5 Mbps and multiple long outages every year.

Last month I was able to install a Starlink satellite system. Although 50% more expensive to run than a BT system the change has been amazing with reliable speeds of between 100 and 200 Mbps. The reliability should also be much better. Interestingly the BBC also posted a story about Starlink being trialed in Wasdale this week.

It is a straightforward thing to do so I just wanted to share some notes on what I did.

This description was just by trial and error, others will have better advice and may offer professional services. My needs were probably more complicated than most users.

Actual internet speed now
actual internet speed now

What is Starlink ?

Starlink is one of Elon Musk’s companies. They have 3,000 very small “Low Earth Orbit” satellites which are used to beam the internet to users with a small dish. The satellites are much closer than traditional satellites and are constantly moving across the sky so the dish is smaller and automatically tracks the satellites. There are many more satellites planned and it would be fair to say that there is quite a bit of concern about these satellites from a space pollution point of view.

What is the internet  signal like ?

The signal is fast, typically between 100 and 200 Mbps. The latency, the electronic echo, is around twice that of traditional broadband signal but it is not something that you will notice. Realistically you do not really need speeds much over 30 Mbps.

The signal is reliable, the system typically logs two or three 10s outages per day

How much  does it cost ?

There is an upfront costs of £460 and then a monthly costs of £75, so about 50% more than our old BT package that delivered rubbish internet and failed several times a year, often due to lightening strikes.

The volume of data is currently unlimited but there was a recent announcement that speeds may be capped after a certain volume is reached at some unspecified point in the future.

I also stopped our traditional phone line and replaced the phone with a “VOIP” phone. This costs about £5 per month for a local number.

What equipment is needed ?

There are two answers to this – the first is what do you need for the ( very effective ) basic system and the 2nd answer is what I actually used.

The basic “Out of the Box” Starlink system will met all of your basic needs for good internet surfing. In the box you get a small rectangular dish ( 50cm x 30cm ) with a tripod mount, a cable and a control box / Wi-Fi base station.  The Wi-Fi dish could sit in your garden and, as a rule of thumb, needs a 100o clear view of the sky. There is a very good phone app that you can use to check your planned location. I was still a bit nervous about visual obstructions from the adjacent buildings but it was OK in operation.

satellite visibility

Our dish in Cumbria tends to point slightly southwards. The cable to the control box / Wi-Fi hub is 75 foot long and it is surprisingly stiff and, because of a large plug on the end, needs a 22mm hole to go through walls. You can get a longer 150 foot cable and there are lots of articles on how to cut and re-splice the cable but I was not brave enough.

starlink

The supplied control box / Wi-Fi hub is pretty good.

I used this “out of the box” system for a few weeks and it was very good but, a bit like Apple devices, the functionality is deliberately simple to keep it reliable for most users.  I needed some extra functionality so added more bits.

What did I do ?

>The Mast

The first thing that I did was to mount the dish in a mast attached to the house. In the Lake district it had to be away from public view so I mounted it at the back of the house. I may have been over cautious but being a dry stone wall opted to use two brackets spaced about 1m apart. I also wanted to use a “dogleg” style mast to be able to position the dish over the roof. As it worked out a straight mast with two longer brackets to clear the guttering would have worked just as well and would have been cheaper.

The parts were sourced from ATV in sheffield who were very helpful. The mast is actually mounted upside down to give the 1m spacing between brackets ( 1m happened to be some larger stones )

ariel mast
Starlink mast

The Starlink cable exited at the joint above the mast meaning that amalgamating tape was need to ensure a tight fit between the mast and dish bracket.

>External Wi-Fi

I needed to transmit the Wi-Fi signal externally down to the garden which is separated from the house by a lane. To do this I used an external TP-Link EAP225 Access Point which I also mounted on the mast. These access points are omnidirectional ( the signal goes out in all directions ) but are still pretty powerful. As a rule of thumb they work best “line of site” and with a modern phone I was able to use the Wi-Fi 300m away although on an older tablet it was too far. This scheme also needed a Starlink Ethernet Adapter.

access point
Access Point

If you are not comfortable with technology and only need the Wi-Fi extending internally then Starlink do some rather pricy Mesh Wi-Fi extenders. These are additional Wi-Fi stations that repeat the original Wi-Fi signal making it reach further. There are other alternatives discussed below.

>Ethernet Adaptor

The Starlink Wiki bases station is very simple and does not have any ethernet ports. I needed ethernet for the external Wi-Fi and to connect some gadgets to the internet. I had to buy an adapter from Starlink for £35. This ethernet port is located at the Wi-Fi end of the cable and not at the dish end. It only allows one ethernet connection so a hub may be needed, see below.

Product Image
Starlink ethernet adapter

>Alternate Wi-Fi Base Station

Although the Starlink Wi-Fi is pretty good I needed something with better functionality, mostly to help with my work. I do think that this new Wi-Fi is a bit better but I have not carried out any structured tests.  I fitted a TP-Link Archer 55 Wi-Fi Router ( base station ). The Starlink Wi-Fi Base Station is Wi-Fi 5 whereas the Archer 55 is the newer Wi-Fi 6 standard. When using an alternate router the Starlink Wi-Fi is generally disabled.

Text

Description automatically generated with medium confidence
Archer 55 router

>POE Hub

In order to connect all of these things I used a TP-Link 5-Port Gigabit Desktop PoE Switch. POE stands for Power over Ethernet. This means that the data cable also transmits 48 volts of power. This means that you do not need to run separate power and data cables to the external Wi-Fi Access point and the VOIP phone.

A picture containing text, electronics

Description automatically generated
POE network switch

>VOIP Phone

One of the few advantages of the pandemic has been that there are lots of cheap 2nd hand VOIP office phones for sale. I picked up a SNOM 710 for £10 on ebay. Just be careful as the separate power supplies are often not included and you wlll need a POE device as described above. With one of these phones you can have a local number for £5 per month via Yay.com or similar. I get my number through work.

Snom 710 VoIP Phone - POE - 3CX - 6 Months Warranty - Inc VAT - Picture 1 of 1
VOIP phone

>Wi-Fi Repeaters / Extenders

I have a friend who set up a community fibre network in rural Scotland. He swears by a brand called Ubiquiti These are the gold standard, and industrial grade, but for home stuff I tend to opt for cheaper brands like TP-Link – which makes him despair 😊 He is correct that if you want a really good experience then ubiquity is hard to beat. The costs are more and you may need to start paying an unclear annual subscription fee after the first 3 years.

Ubiquiti ( and other more expensive systems including TP-Link ) are Mesh systems. This means that you have one extended Wi-Fi that your devices navigate seamlessly. With cheaper non mesh “range extender” systems you end up with multiple different Wi-Fi zones and devices will sometimes stay connected to a weak Wi-Fi signal when there is a stronger signal available nearby.

There are three types of cheaper repeaters :

Homeplug units.

Homeplugs are both very clever and relatively cheap but may limit your speed a bit. They use your houses electrical system to transmit data. Typically one of these is plugged into both the power and your Wi-Fi base station. You can then have one or more other units around your house to create small Wi-Fi zones. You will need the Ethernet Adapter ( and possibly network hub ) described above to use these.

A picture containing text, electronics, projector

Description automatically generated

Wall Mounted Range Extenders

Range Extenders are similar to the above except that they amplify an extending Wi-Fi signal rather than passing the data signal through wires. If your Wi-Fi will reach the top of the stairs but not the bedrooms then a range extender will project that signal further.

Text

Description automatically generated with medium confidence

WISP Routers ( what I used )

Most of the range extenders plug directly into sockets so may be shielded by the wall. Where this has been an issue I have used the TP-Link Archer C50 router which unusually has a “repeater mode”. This is sometimes known as a Wisp Mode . The benefit of this unit is that you can position it next to a window to improve the signal and it also has ethernet ports that you can plug gadgets into.

Graphical user interface, text

Description automatically generated
Archer C50 WISP capable Router

The garden was a bit borderline for range ( @100m ) and this device. If you needed to create a longer Wi-Fi link, even up to 3km and line of sight, then you would use a directional Wi-Fi Access Point like the TP-Link CPE210. I think that the downside to these might be that although they are WISP type devices the Wi-Fi beam is quite narrow. This may mean that the local Wi-Fi range for general home users at the receiving end will be poor. You may need to connect these devices to an omnidirectional unit like the Archer55, the EAP110 or the Archer C50 devices mentioned earlier.

If you are after the best experience go for a Mesh system. For external use you will need to go Ubiquiti or similar.

Conclusion

This is the final system

So has it been worth it and what would I do differently next time ?

Yes, it has absolutely been worthwhile in giving both the family and guests more flexibility, internet access is a utility these days and the government needs to recognise this if people are to work and study efficiently.

If it was doing it again I would simplify the ariel mast by using longer brackets to allow a straight mast to miss the guttering. I might still go for the dog-leg mast to swing the dish over the roof.

The Starlink cable was difficult to run because of its stiffness and large end plugs. One of the advantages of using an alternative router is that the link from the Starlink controller to that unit can use more flexible, and cheaper, Cat 6 internet cable. This means that you can position this router more centrally in the house.

If you would like to ask any questions please use this facebook post or get me on twitter at @seancull

Some learning from helping with a GCSE cycling video

This article is to capture some learning from helping my son to produce his first GCSE PE cycling video. The steps below can be done by the kids themselves once the scheme has been practised. It took us many attempts, hence this post.

These videos are part of the coursework and there lots of things to think about but this post is just about the fairly basic mechanics of producing the video with an overlay for the Garmin Data. There are other videos on the web such as this one that may be of use.

The free Garmin Virb software is very good and integrates the Garmin data ( speed, location etc ) with any .MP4 video from any camera ( I think ) )

Really Important Point

DO NOT pause the video at any time while you are recording as it makes it very difficult to merge the data trace with the video.

Tools

Cheapish GoPro Action Camera Clone – APEMAN Action Camera 4K 20MP Wifi Sports

Chesty V2 GoPro Chest Harness ( not sure if direct mount on bike top tube would be better for drop bars on road )

Video Camera – Sony HDR-CX405 – budget end of the range but seems OK

Garmin cycle computer

Garmin heart monitor

Decent Windows Home PC

Software

Free software – Garmin Virb https://buy.garmin.com/en-GB/GB/p/573412
Note a Garmin Virb action camera is not needed ( but it might be easier to sync the data and video ?? )

For the “Picture in Picture” parts which show two video sources I used Camtasia Studio which I am fortunate enough to have for work as it is expensive. There may be other options if you want to go down this route.

Workflow

Note that these are all slow processes. Step 1 took 60 seconds to setup and 30 + minutes to export the file. Keep things as simple as you can.

1) The action cameras typically generally split the video file into 5 minute mp4 files.
Join these together using Garmin Virb software and Export it to a single file.

Do not do anything fancy

The biggest reason to do this is to stop you having to synchronise multiple different video files with the Garmin data file. I found this very difficult.

2) Import this long MP4 file into Virb as a new project. Note that this takes a while ( 20 mins ) as it gets “optimised” during import despite having just been exported. [ It is making a low resolution copy for editing speed but it will apply the edits tot he high resolution copy in the final export ]

3) Trim the video to get rid of any un-needed start or end footage ( in Virb )

4) Import in the Garmin Data file from the Garmin cycle computer

5) Synchronise the video and the Garmin data

6) Synchronise the start time so that the lap times run from the start whistle and not from when the Garmin was activated.

7) Add the data gauges ( distance, laptime, heartbeat, map ) to the video video

8) Add any titles or notes that you want.

9) Export the video as a single .MP4 file.

10) [optional] Merge the “picture in picture” portions with Camtasia.

The Results


#CullsMadAdventure2017 – Cycling the Danube with Kids and a Tent

In June 2017 we cycled from Linz in Austria to Vienna along the Danube cycle route. It was an amazing holiday and this is a diary of our journey.

We were also raising money for charity – you can still sponsor us here

There is also a more detailed technical post here.

The idea

The main idea was to have a bit of an adventure and to show the kids that holidays like this are well within their grasp when they are 16/17.

The trip was to cycle about 250 km along the Danube camping as we went and then to spend 3 days in an AirBnB in Vienna with my mum. We started in Linz and cycled to a few miles outside Vienna.

The trip was self supported

The Organisation

Jane ( my wife ) researched the route, booked the campsites and spent what felt like several days and several hundred pounds on the phone booking the trains ( Bikes cannot be booked on line ) – Thank-you Jane !

Us

Me ( 48 ) , Jane ( younger ) , John ( 12 ) , Emma (10)
We have bikes but are are ( were ? ) not “cyclists” in the hobby sense.

Day 1 – The overnight DDFS ferry from Newcastle to Ijmuiden

We took the overnight ferry leaving @5 and getting in about @9. It was great to see so many pedal ( and motor ) bikes on the ferry and it really got the kids into the spirit of it all.

The kids loved the cabin with the bunks ( there would be much comparison on different bunk beds on this trip ) and the trip went pretty smoothly and was very civilised considering it was the “Hen and Stag” ferry on a Bank Holiday weekend.

Day 2 – Ijmuiden to Amsterdam and Hanover and a late Sleeper Train

From the ferry we cycled @30km into Amsterdam. There is a well marked cycle route although we may have gotten lost for a while 🙂

The weather was hot ( @30 c ) but the kids did really well.

The Dutch cycle ways were pretty scary at first. The Dutch take then quite seriously and stopping or, God forbid, doing a u turn generates howls of protest from other cyclists – it’s OK once you realise that you need to treat them like real roads but it took all of us a while to get into the habit.

In Amsterdam we looked at the Anne Frank House from the outside ( no tickets left ) and generally had a wander along the canals eating ice creams before cycling to the train station where we had some food and got the train to Hanover.

Parked up while we walked around Amsterdam

Parked up while we walked around Amsterdam

Getting on this train was our first experience of getting all of the bikes ( and the trailer ) onto a train – it was a bit shambolic with a bag of food ending up on the tracks. We got there in the end and our “loading routine” got better as the holiday progressed.

We met some lovely people on the train. One guy was handicapped and was in an electric assist recumbent – he had a really positive attitude and just took everything in his stride. He and his friend were off on a 4 day tour.

In Hanover the sleeper train was delayed by about 2 hours and we eventually got on board after midnight. We had to change platforms twice – there was a dedicated ramp and an access tunnel for each platform but it was for official traffic only. On the first change I got called back by other passengers and had to use the lift ( 5 times down and 5 times up ) .When the platform was changed again later all 4 of us quickly sped down the access ramp and up to the new platform  – the kids filled with a mixture of both fear and excitement at breaking the rules 🙂

Wide awake waiting for the train

Wide awake waiting for the train

We got onto the sleeper train just after midnight and stowed the bikes away. The kids loved the excitement of a sleeper train and yet another set of bunks to try.

Day 3 – Linz and the Danube Cycling Begins

Because the train was running late the attendant could not tell us when we were due into Linz. He promised to wake us an hour before hand with breakfast ….

He forgot ….

After spending the night fighting auto retracting blinds I woke up 15 minutes from the station with 2 soundly sleeping children and the 4 bikes 2 carriages further down the train.

It was all a bit stressful and chaos ensued – chaos being a large heap of bikes and bags on the platform and our breakfast in paper bags.

We had breakfast in the local park ( parks and swimming pools became a theme ) and set off across and along the Danube. It was another very hot day but the kids did really well, especially after two nights on the move and we made good progress.

We stopped at a local swimming pool at  Mauthausen about 5k from the campsite. Daily swimming pools became the motivation that kept Emma going through the day. They were very reasonable and £2 – 3 per person ( apart from Vienna ).

The campsite was beautiful and almost empty . We were surprised how empty most of the camp sites along the Danube were. Apparently the good weather was unseasonably good  and the tourist season had not quite started ( this was early June ).


Emma made dinner, John pitched their tent beautifully ( except the fly sheet is inside out ) and I scalded JaneCull’s foot with the trangia ( not badly ).

John had apparently picked up a large splinter in his bum on one of the slides but maintained he was fine and Emma decided to ride off the path and into the Danube stopping just in time. All in all a pretty average day on #cullsmadadventure 

Day 4 – No Food, The Snake & Mechanical Disaster

We had a very leisurely breakfast chatting to a very friendly Canadian who had worked all over the world in international schools and had previously done the trip with 30 kids ! We got going at about 11:00 after wasting some time trying to find a local shop ( there isn’t one)

@21 miles today ( 25.8 according to John). Very hot again at @30c. We were short of food with there being no shops so John and I blasted on ahead to find a shop and bring back food.

The most exciting bit was when a 1m snake jumped out of my path and into his, it was his first wild snake and a good sized one at that. We found a small cafe after 11Km just past the hydro dam at Hütting and Emma was very pleased when an ice cream was couriered to her.

John’s two biggest triumphs were that he mastered wheelies and that he beat Jane up a hill by 5 minutes on a scenic detour that they took to Burg Clam.

His competitive streak was really coming out. Whenever someone passes him on a racing cycle he accelerates off behind them and slip streams an inch off their back wheel on his mountain bike with huge panniers until they notice. Sometimes he gets away with it for 5 -10 minutes.

Apparently Jane has agreed to go halfs with him on a shared road bike.

Emma did really well too. Her main motivation again was finding a swimming pools. The one today was good and much warmer than yesterday’s somehow.

Emma and I had a lovely time cycling through the Poppy fields while Jane and John went on their detour.

Towards the end of the day we did have a major sinking feeling when Emma’s  dropout / hanger snapped leaving her gears dangling in mid air. Fortunately we were only 1km from the campsite and an excellent bike shop.

The part is unique to her British Islabike bike and when it happened in the UK on a previous occasion the bike shop couldn’t fix it without the exact part.

I towed her behind the trailer to the bike shop but I really thought she would be stuck in 1 gear for the next 120km . The Austrian bike shop had different ideas. They took a part from another brand and ground it down so that it fitted. It wasn’t cheap but I am glad we asked as I had resigned myself to removing the gears and leaving her with only one gear ratio.

He did ask her for a bribe to say it couldn’t be fixed 🙂


Day 5 – An idyllic lunch and the Wrong Bridge

Day 4 of #cullsmadadventure was the longest day yet at @ 50km. It went really well, no snakes, no breakages and only the small complication of the boys ending up on the wrong side of the Danube for 5km.

The day started with the obligatory visit to a play ground and then a small ferry across the Danube.

We had lunch in a beautiful town centre at Hofamt Priel. A very relaxed affair with lots of fresh food and ice creams. It was very nice to find some open shops after being caught short in the morning.

John’s wheelies continued to get longer or “wheelie good” as he likes to tell us at every opportunity. He was in great spirits and his co-share road bike idea with Jane now seems to have become a cyclo-cross bike.

John and I went on ahead of Jane and managed to end up on the wrong side of the river by taking the wrong bridge ( my fault ).

It was very hot and John was starting to feel the strain. I think that he had over done it the previous day beating his Mum up the climb to Burg Clam. This was us waiting for the girls on the “wrong” bridge.

So we phoned the girls and the conversation went along the lines of

“We are on the bridge, where are you ?”

“No, WE are on the bridge where are you ?” – you get the idea.

All sorted in the end but John and I were left wandering around Aldi in the beautiful town of Melk with 2.85 euro wondering how to buy supper – we ate out in the end.

Getting food on the trip was more difficult than you would have thought. We arrived on a Sunday and hadn’t realised that local shops are also closed on Wednesday.

Mind you even after the “fresh” milk has been bounced about in the trailer for 2 days it still tastes the same but warmer….and not really that nice. The route itself doesn’t pass through that many towns, at least not when you need them.

Emma was in great spirits too and is still on a mission to try every playground en route and with no swimming pool this evening took to swimming in the Danube.

She had really taken the whole sponsorship thing to heart and it really has spurred her on.

Jane was in good form too, probably even more so that I couldn’t afford any more pasta meals in Aldi and we had to eat out.

The light weights that we are we kept the half bottle of wine from last night so it will be interesting to see how that tastes after a day cooking in the trailer, probably similar to the milk I think 🙂


Day 6 – Cheap Spanish Wine amongst the Reisling Vines

A medium length day @25 miles with a good tailwind. We could have gone further but there were no campsites within range further along the river. We had our only puncture as we left the campsite int he morning.

The kids were still in good form and we’re flying along. John’s wheelies and hands off cycling continue to improve.

Emma was motoring too with her highlight of the day being a carefully choreographed red arrows display with her as “Red Leader” and the rest as reds 2,3 and 4T – “T” designating the trailer.

Moving from the “Diamond” to the “Arrow” formations and every other combination kept us going for miles, much to the confusion of the Austrian cyclists who disapprove of such things.

Jane and I managed to finish our 3 day old bottle of Aldi Spanish wine at lunch time sitting amongst the Austrian Reisling vines,I am not sure what the locals would have thought.


I think the kids might have mistaken it for Ribena as there was much photo bombing and general hilarity at about the same time.

Emma finished off the day visiting yet another outdoor swimming pool and after beating her dad down 5 slides made her first jump of a diving board in penance.

Jane was in good form too. We had great fun touring the centre of Krems with the kids on backies last thing. She also made me supplement our pasta rations with real vegetables.

Day 7 – Vienna

A long day @32 miles but with real beds at the end

John and Emma did really well. Emma’s most exciting incident was wiping out a small signpost while under tow, I have absolutely no idea how she recovered it but she did. She was absolutely on her limit distance wise and is chuffed with what she has achieved but quite pleased to be finished ( today was her only day under tow )

John’s essential cycle touring skills of wheelies and hands free cycle still continued to improve but his HUGE achievement today was at the train station later in the day.

We got on a fast intercity type train for one stop into Vienna. It was a bit stressful ( bikes and trains seem to be stressful ) as there were no bike spaces so we ended up standing with bikes and a trailer in the aisle.

At the next stop we literally threw all the gear off as has become customary but I stayed on to go to the airport to meet my mum. The plan was to leave one bike locked at the station for me to collect later.

As I jumped back on the train I said to John to be a “big man” and help mum and Emma as best he could.

As with all of the stations we have used the only way to get off the platform is steep stairs or a small lift . In this case the lift was literally always full and after 30 minutes only Emma had managed to get her bike up. So John insisted on carrying the 3 remaining bikes, the 6 panniers, 2 tents and, with his mum, the trailer up the stairs. 6 flights of stairs EACH time. A huge effort that would make his Rugby coaches proud.

Emma was brilliant too looking after the arriving gear for over an hour on her own. One of the locals came over and congratulated Jane and gave her a box of grapes and a huge bag of chocolates.

I ,meanwhile, was sitting in the air-conditioned airport but on the bright side did get to bring my mum back to stay with us.

Emma reflecting on the trip at the end of the cycle to Vienna

Days 8 – 9 Vienna

Relaxing, Ice creams and Tourist Stuff


Day 10 – Vienna to Dusseldorf via sleeper train

We cycled in the central station in Vienna in the pouring rain ( the first time it had rained all holiday ) and took the sleeper to Dusseldorf. This time the attendant woke us up in good time. The Thai take away at Vienna Central Station was very good.

Day 11 – Train Dusseldorf – Amstersdam  and 30K cycle to Ijmuiden and Adopting “Donkey”

From Dusseldorf we took a train to Amsterdam. We were a bit anxious about the bicycles as we just had open tickets and the train supposedly had a limit of 10 bikes – and more and more bikes kept arriving. It was OK in the end but we were concerned enough to have a plan to split into 2 groups and meet back in Amsterdam or at the ferry.

Once in Amsterdam we cycled @30 KM back to Ijmuiden. It was the first time we had a head wind and it felt like a fair distance.

Along the way a dutch cyclist making a great effort came chasing up behind Emma thinking that she had dropped a toy Donkey and insisting on giving it to her. She was quite pleased that we were unable to find it’s owner.


The kids celebrated with a cold drink on the ferry.

The End

It was been a fantastic trip with all the elements of an adventure. We have sailed on ferries, travelled on sleeper trains, wrestled bikes and trailers on and off trains and cycled 225 + kms ( including Holland ) with full camping gear. The kids and Jane were amazing and we have raised some money for charity. It is also the longest I have been away from my laptop in many years 

If I had one overall hope before we started it would be that the kids could see that adventures like this are entirely within their grasp and that when they are 16 or 17 they could be doing them with friends. I am hopeful that we have achieved that.

A big thanks to everyone that sponsored us and lastly a big thank you to Jane who spent ages planning and booking everything and had the faith to go with it.

We have raised £545 so far. If you would like to sponsor us, and in particular the kids, see the link below. All of the money goes directly to the charities.

The Cull Family Danube Bike Ride Sponsor Page

Cycling and camping with kids along the Danube – Linz to Vienna – 2017

Hello, we are just back from a great holiday cycling along the Danube in Austria with two kids, Emma (10) and John (12) and camping. It was a great introduction to cycle touring and I wanted to share some of the information here for anyone else that is thinking of doing it.

This is more of a technical post – see this post for a diary of the journey.

amsterdam last pack

About Us

We are a family of 4. Jane and I cycled the C2C last year and the kids cycle to school but we do not cycle as a regular hobby.

Why the Danube and the Trip ?

We chose the Danube because it is pretty much down hill for the whole journey ( challenging side trips exist ) and there are good campsites.

We used to do more adventurous holidays before we had kids now that they are 10/12 we wanted to see if we could do some more. We did 4 days wild camping in canoes in Ireland last year so the kids have some experience of that kind of thing.

My big hope was that we could to show the kids that trips like this are well within their grasp and their budget when they are 16/17.

Our Kit

We had 3 x 26″ mountain bikes and 1 x 24″ mountain bike. The bikes were all more than 10 years old. We also had an old bike trailer ( originally used to take the kids to nursery so there was a certain nostalgia in using it for this trip ). The 3 larger bikes had full size panniers and the smaller bike had some mini panniers.  We also had a trailer.

We had 2 x 2 man tents, 4 sleeping bags ( 2 quite large and 1 fairly large ), 4 x thermarest style sleeping mats, 4 x inflatable pillows, a large trangia, trangia fuel bottle, 4 x bowls, 4 x sporks, 2 x travel towels,  2 x head torches, 1 x spare tube for each wheel size, 2 x multi tools, 2 x sets tyre levers, 2 x puncture kits, 2 x bicycle locks, 2 x washing lines, tow rope, cargo net, bungees, guide book, phone battery power bank, tie wraps, duct tape, a handlebar mounted bag for passports, money etc.

Each pannier had a 25l  Karrimor Dry Bay and then a smaller one for any wet rain gear. The tents and sleeping mats were in two largish Ortiweb bags and there were two waterproof duffel bags for clothes and pillows.

The large Ortliweb and waterproof duffle bags went in the trailer but with older kids we could easily have had each bike with 2 panniers and a largish waterproof bag across the panniers and no trailer.

The Logistics

We took :

The trains and ferrys are relatively easy to book on the web BUT you cannot book bicycle on the web and YOU REALLY NEED TO RESERVE bicycles on the major trains ( especially if there are 4 of you )

Jane did the train booking and our phone bill came to almost £200. This included having to re-book them after it became clear that there was Engineering Works on the return journey.

We booked through the Austrian railway but it was very difficult as you had to ring Austria and English was not widely spoken. There were also issues whereby the cycle reservations had to be done in a phase 2 some time after the people were booked.

We later dealt with the German Railways to modify some bookings and the process was much much easier because there was a UK telephone number and the staff had excellent English. My recommendation would be to try and do everything via the German system if possible although we are not sure it is possible for the sleeper to Vienna .

Accommodation

We slept on 2 ferrys and 2 sleeper trains.
We camped 4 nights and at the end of the trip sated in an AirBnB in Vienna for 3 nights.

Day 1 – Ferry + 30K cycle
Day 2 – Sleeper Train
Day 3 – Campsite 1 –  in Camping Au Donau . This was @30km from Linz
Day 4 – Campsite 2 – Campingplatz Grein – – This was @30km from Campsite 1
Day 5 – Campsite 3 – Inn and Campground Fam. Stumpfer – This was @45km from Campsite 2
Day 6 – Campsite 4 – Donaupark Camping Krems – This was @30Km from Campsite 3
Day 7 – 9 AirBnB Vienna – A fantastic apartment in the suburbs –  This was @40km cycle + a train
Day 10 – Sleeper Train
Day 11 – Ferry  ( with 30K cycle )

Food

We brought our own food ( Pasta Boxes and cereal ) onto the ferry which is horrendously expensive. This worked well.

On most of the camping nights we cooked on the Trangia with meals such as Batchelors Pasta ‘n’ Sauce, Cheese, Leek & Ham dry packets using 1.25 packets per person ( there is no way they serve 2 people ). We brought these packets with us.

For lunch we had fresh bread, cheese, ham and vegetables.  For breakfast it was fresh croissants or cereal. Even the “Fresh” milk in Europe seems to last for days being bounced about on the road.

Key Learning

Trains and Bikes are stressful

There are three aspects to this.

One is physically getting bikes ( and a trailer ) on and off the trains. We got better at this with some practice and process ( remove panniers first, 1st adult on to receive bike, 1st kid larger with bike, first two bikes hung on hooks, 2nd kid with bike, last adult bike, panniers handed along a chain, trailer on last. It is worth noting that most of the platforms have train specific plans showing where the bike carriages will stop although it doesn’t always work as described.

Getting the bikes on and off the platforms can be tricky too. All of the platforms have small lifts which can take 1 or 2 bikes but in Vienna there was a real issue with the lift being permanently full from the floors above and below. i had gone to the airport to get my Mum so John ( 12 ) ended up carrying all of the luggage and bikes up 6 flights of stairs while Jane and Emma ( 8 ) stood guard over the kit at each end. Towards the end of the trip our preferred routine was to wheel the parents bikes down the stairs and just use the lifts for the kids and trailer. It is very worth while getting the “DB navigator App” which shows in great detail which platforms European trains will arrive at.

The 3rd ( and most stressful ) is not having reservations. We had reservations on the sleeper trains but the intercity into Vienna ( 1 stop ) and the trains to Dusseldorf and Amsterdam we didn’t.  On the intercity we literally ended up standing in the isles with our bikes. On the other trains we got them into bike spaces but by the end of those journeys the 10 bike quota was well exceeded. We had contingency plans to abandon the trailer and /or split the group into two trains.

Carry Plenty of Food and Water

Shops along the way do not open on Sundays and Wednesdays, make sure that you have enough stuff for breakfast and lunch well in advance. There are generally good opportunities to refill water bottles but there were a couple of long hot stretches with no options. Next time i would take two water bottles.

Kids need a target

The motivation for my daughter was a swim at the end of each day ( there were lots of reasonably priced and well equipped outdoor pools ). This worked really well.

The motivation for my son was to beat his parents to  the end of each day 🙂

Dutch Cycle Routes are scary for the inexperienced

Rather than being the safe haven that we expected the Dutch cycle routes were actually quite scary at first. The locals cycle quite quickly ( even on their town bikes ) and child stopping or turning on a cycle route causes loud exclamations and much annoyance. There were also scooters and micro cars on the cycle ways but to be fair they were almost always considerate to us.

The trick is to treat the cycle routes just like real roads with very strict lane discipline. The cycle way along the Danube was a lot more more relaxed.

Towing can be useful but scary

We had to tow on two occasions, one for about 1 km when Emma’s derailleur came off ( snapped hanger ) and on the last cycle day when Emma was struggling and we were under pressure to get a specific train so that I could get to the airport to meet Mum.

We had taken two bungees and a light rope specifically to tow. Technically it worked well but the issue was Emma’s concentration. It would get a bit hairy when she lost concentration. The solution would be to have one parent tow and the other ride alongside the child to keep them in the correct position. We agreed that we would only tow on quite cycle only routes and never on the road.

Never Assume a bike cannot be fixed

Emma’s drop out / hanger broke on the 3rd day. It had happened once before in the UK and the bike shop could only fix it with a specific replacement from Islabike which took a few days to source by post.

When the same thing happened in Austria I was resigned to removing the derailleur and leaving her with just one gear – and a 40km day the net day. I towed her the 1km to the bike shop where the owner was much more optimistic and took a grinder to a part from a different make and adapted it to fit Emma’s bike. After the repair it worked flawlessly. It wasn’t cheap but it made a big difference to the trip.


Sloping in Rostrevor / Ballynagelty Mourne Mountains – wind published S – SW actual SE

Just a quick post for the record. I had a good session sloping off the hill above Rostrevor.  I initially hoped to slope off by CloughMor Stone but although the wind was blowing at 25 – 30 knots it was quite sheltered there. I set off further up the hill to a spot just below the summit shown with the green arrow below.

The wind was forecast S – SW but locally it seemed more like SE, This might be the influence of the Cooley mountains to the south ( there is slope soaring at the flagstaff transmitter ) .

The landing spot is downhill but is OK if you have flaps and there is a strong breeze. There might be a better spot on the top of the hill but this was good for me with the strong wind. The lift was very strong once you got out 75 m or so from the slope but it did seem quite “lumpy”.

Parking is at the “Top car park” ( blue arrow )  but it is a stiff climb to where I flew.

Would i fly there again ? It is local to where I was staying so probably yes. with more time I might explore Slieveban which is 1 km to the east as the landing might be better.


2015-12-28_11-03-37

2015-12-28_11-41-13


Finding a lost model with Taranis ( or other ) Telemetry

Some time ago Bruce Simpson of RC model Reviews mentioned using the Taranis Telemetry to find a lost model. I have used it several times lately so thought I would pass on this tip.

The idea is that the lowest signal is when your antenna is pointed directly at the model – which is why you fly with the antenna at 90 degrees ( did you know that ? )

If you have a telemetry enabled receiver ( a RX battery voltage display is a good indicator ) then you can get the Taranis to display the strength of the telemetry signal from the RX to the TX. This is known as the RX RSSI.

If you stand with the antenna pointed straight out and slowly rotate 360 degrees then when the signal is at its lowest you are facing directly towards or directly away from your model ( slight rub there ).

The screen below shows the default RX RSSI

2015-11-27_20-31-44


You can add a more useful RSSI reading to the telemetry screen using Companion as shown below

2015-11-27_20-32-35

2015-11-27_20-32-59

As you get closer to the model you may need to enable range check mode to reduce the signal strength to see a discernible difference. In this case it is the RSSI in the pop up window that you use to gauge the signal strength.

2015-11-27_20-57-09

This method also works on other Telementry enabled transmitters. I helped a club mate with a very posh Jeti transmitter to find a model last week but the Jeti has 3 4 antenna built into the handle so the directional aspect was not as good. He did find the model by walking around until the signal peaked and then going to range check mode to narrow it down further.

Guest Post : Marc Merlin : Taranis 6 channel with throttle and crow combined on one stick.

Marc Merlin contacted me with his modified config a the 6 channel motor glider asking if I would post it here. His post is below :

I owe huge thanks to Sean Cull for posting his detailed configuration here:
http://seancull.co.uk/2014/07/07/v2-frsky-taranis-6-channel-configuration-eepe-with-trainer-flaps-crow-spoilers-reflex-and-instructions/
I encourage you to go look at his detailed explanations if mine seem too short. While they don’t apply to my model config, he explains very nicely how things generally work, and this is where I learned most of what I know about Taranis programming.

I’m sharing my 7 channel glider config because it allows you to setup your flaps asymmetrically where they go down more than up, or only down. You decide how you want to set yours up and you only need to change the subtrim in channels 6 and 7, something that was very non obvious to me when I was learning how to program my Taranis.

My setup is also different from Sean’s by having the throttle stick control crow flaps from 0 to 45%, nothing from 45 and 55%, and then throttle from 55% to 100%. This allows you to use a single power lever to slow down from gliding, or add power to gliding, middle being neutral. No switches to flip to switch from crow flaps to motor power, which is very handy if you have to cancel your landing as the last second.

You can read more about it and get the config files here:
http://marc.merlins.org/perso/rc/post_2015-05-17_Cularis-7-Channel-Glider-With-Crow-Flaps-and-Washout-Taranis-Config-EEPE.html


Winter Hill – Idiot Hanglider Pilot Endangering Himself & Costing me £90

I was flying an R/C model at Winter Hill today when the owner of this car cut right across the model flight line. I am relatively new to slope soaring and was doing practice landing circuits. I panicked and tried to wave the pilot off thinking he was unaware of the models – there were 5 in the air including two high performance ones – one on its maiden flight.

In trying to wave him off I crashed my model and wrote it off – yes I know the first rule of an emergency is to fly the damn plane – lesson learnt.

The pilot then came around again – right through the middle of the R/C gliders again.
I tried to do the right thing. Did I crash my model to stop the pilot being endangered – no I didn’t but I would have done if necessary. Would I do it next time – I would definitely pause for thought.

I spoke to the pilot when he landed – he was totally unapologetic and quite arrogant – “sorry mate it was the turbulence”. Total rubbish – he did it twice.

If anyone knows this person can they please talk some sense into him. He is no ambassador for your sport and I am £90 out of pocket thanks to his arrogance. I am seriously tempted to fill in a BHPA incident form on his behalf.

idiot