Category Archives: RC Models

Configuring the Taranis Trainer / Buddy Box Functionality

both

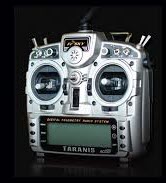
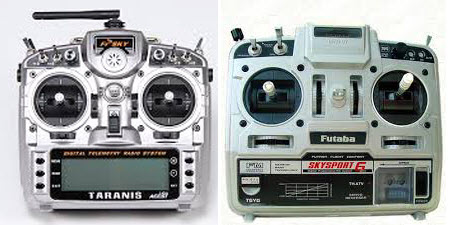
I use an old 35 Mhz Futaba SkySport 6 as a buddy box for the Taranis. It works really well and with OpenTx 2.x you can now also pass through more than 4 channels for things like the flaps.

Initially I used a Phoenix Simulator adapter but just recently I have soldered the buddy lead directly into the Futaba for better reliability. I would recommend using the simple JR lead rather than a stereo lead but opinions on the web seem to vary.

The Basic Concept

The basic concept is simple. The buddy box passes a copy of the output signal to the Taranis via a simple 2 core trainer cable ( that bit surprised me ). The Taranis sees these inputs as Input Channels 1 – 4 ( and more in OpenTx 2.x – see later ).

The inputs can be calibrated and scaled / multiplied. Each of the inputs is mapped to a stick and the mapping can include a weighting e.g. 125% and whether the signal is absolute ( no master input when the student is in control ) or additive where the master and the trainer signals are added together and the resulting sum applied to the model. The second option sounds very clever but having thought about it doesn’t really seem that useful.

Up Front Decisions

Before you start you need to decide on some basic things :

  • If your buddy box has dual rates will you use these with your student or will you use the dual rates on the master ( Taranis ) for both instructor and student ? I prefer to just use the Taranis rates as it is one less switch to check. If you do this then remember to disable the dual rates on the buddy box.
  • You can configure the Taranis to take all of the flight control inputs from the buddy box or just some of them. My Bixler setup has a switch that in one case gives the student full control and in another leaves me with the throttle control.
  • How do you want to hand control across to the student ? I would highly  recommend the spring loaded switch SH but you could use one of the other switches.
  • I would highly recommend a master engine safety be configured as it is very easy to hand control to the student when they have inadvertently added throttle whilst the model is on the ground. A master switch will protect from both Student and instructor inadvertent throttle movements in the pits.

Step 1 – Connect the buddy box

Connect the buddy box to the Taranis via the lead and switch it on

Step 2 – Navigate to the TRAINER menu

Continue reading

FRSky Taranis 6 Channel Configuration eepe with trainer, flaps, crow spoilers, reflex and instructions

Guide to Taranis "Bixler" 6 Channel

This has been superseded

I have had my FRSky Taranis for a few months now and am loving the software side of it. My son has a 6 servo bixler and I have set up a configuration on the Taranis to support trainer ( buddy ), flaps, Crow Spoilers and Reflex – mostly just to experiment.

You can download the eepe file, the sounds and the instruction pdf below. I will be updating it as I go along – probably to OpenTX version 2 very shortly. I will probably blog various sections too.

This version of the PDF > Bixler_6_Servo_Guide_pub_140607

This version of the eepe and sounds => Everyting_Bixler_6_Servo_Guide_pub_140607

The latest version ( what ever that currently is ) can be found here => http://www.seancull.co.uk/taranis 

The key features I wanted were :

  • A Motor Safety Switch
  • A trainer function so that I could connect the Taranis to another buddy box via a buddy / trainer lead. I wanted to have two modes – a partial mode where I retained throttle control and a full mode where I could pass across all 4 primary functions.
  • High, Medium and Low Rates with Expo
  • Rudder and Aileron mixing to smooth out turns
  • Flaps with elevator compensation
  • Spoilers / Air Brakes / Opposing Ailerons and Flaps or Crow as the glider folks call it. Also requiring elevator compensation
  • Reflex – positioning the flaps in a slightly up position – supposedly makes for more speed – I just like experimenting
  • A basic “panic mode” that removes all mixes
  • Dangerous functions such as flaps or spoilers should have repeating warnings to remind you they are active.
  • Occasional functions should have a once off voice alert to remind you what they are – e.g. the partial trainer mode selection.

Fixing loose navigation buttons on the Taranis Transmitter

images
I got a FrSky Taranis Transmitter from T9 Hobbies recently. I will do a fuller review but so far it has been good and bad.

I would absolutely recommend that you buy the Taranis from an authorised supplier as it is great to be able to return it if it is faulty. T9 seem to carry a wide range of spares and haved a skilled technician who can repair them in the UK.

I absolutely love the software and the open source nature of it. It is really powerful ( see this great example from Mike Shellim ) and I love that you can just surf through all of the open bugs with total transparency.

The bad is the build quality. The hinge pin on the antenna was missing and it had to go back to T9 for repair. Then the navigation buttons came loose. I needed to use the Transmitter over the school holidays so spoke to T9 and they agreed to let me try fixing it myself without invalidating the warranty. It turned out to be reasonably straight forward.

1) Put all of the switches in a known position so that if any fall out ( SE and SG ) you know which way around to put them in.

2) Open the Transmitter shells by undoing the 6 screws

3) As you open the casing make sure the sliders on the side go with the back half and the switches SE and SG go with the front half. Don’t worry if they come loose as they are easy to put back in again if you loosen of the collar nuts.

4) Open the casing like a book and lay it on a soft surface

20140522_220733

5) Undo the 5 screws holding the LCD circuit board and lift this to show the navigation button strips

6) These are a particularly poor design. Use some superglue to re-attach the ends of the button bars. I did consider using a hot glue gun but wasn’t sure. I would also add some glue to the same component on the other side of the transmitter while you have it open.

20140522_205832_2

7) Reverse the above but switch on the transmitter before tightening the screws and check that the switches are the correct way around.